
Show Directions
This sample shows how to launch the map showing directions between any 2 points. There are 2 ways to do so:
- Specify the directions params in the launch config
- Include the directions params directly in the URL
Organizing your code
The Getting Started section details various SDK installation options depending on your requirements. The sample code below is based on a base use case of a plain html page and the ES6 module format.
Specify the directions params in the launch config
The samples below show how to launch the application with directions for 2 or more POIs by updating the config in the initializer code to include deepLinksParms.
<html lang="en">
<head>
<script type="module">
import LMInit from 'https://maps.locuslabs.com/sdk/LocusMapsSDK.js'
const config = {
venueId: 'lax',
accountId: 'A11F4Y6SZRXH4X',
headless: false,
deepLinkParms: {navFrom: "1025", navTo: "551", accessible: false}
}
window.LMInit = LMInit
LMInit.setLogging(true)
LMInit.newMap('.mymap', config)
.then(m => { window.map = m; })
.catch(e => console.error('Error initializing map: ', e))
</script>
<style>
html, body, .mymap {
height: 100%; margin: 0; padding: 0;
}
</style>
</head>
<body>
<div class="mymap" style="height: 100%;"></div>
</body>
</html>
<html lang="en">
<head>
<script type="module">
import LMInit from 'https://maps.locuslabs.com/sdk/LocusMapsSDK.js'
const config = {
venueId: 'lax',
accountId: 'A11F4Y6SZRXH4X',
headless: false,
deepLinkParms: {multipointRouting: true, waypoints: [1025, 870, 551], accessible: false}
}
window.LMInit = LMInit
LMInit.setLogging(true)
LMInit.newMap('.mymap', config)
.then(m => { window.map = m; })
.catch(e => console.error('Error initializing map: ', e))
</script>
<style>
html, body, .mymap {
height: 100%; margin: 0; padding: 0;
}
</style>
</head>
<body>
<div class="mymap" style="height: 100%;"></div>
</body>
</html>Wheelchair Accessibility
Note that you can pass true to the "accessible" param to request that only wheelchair accessible directions are returned.
Try it out
See a live preview or visit the fiddle (note - the fiddle may only display the mobile version due to size constraints).
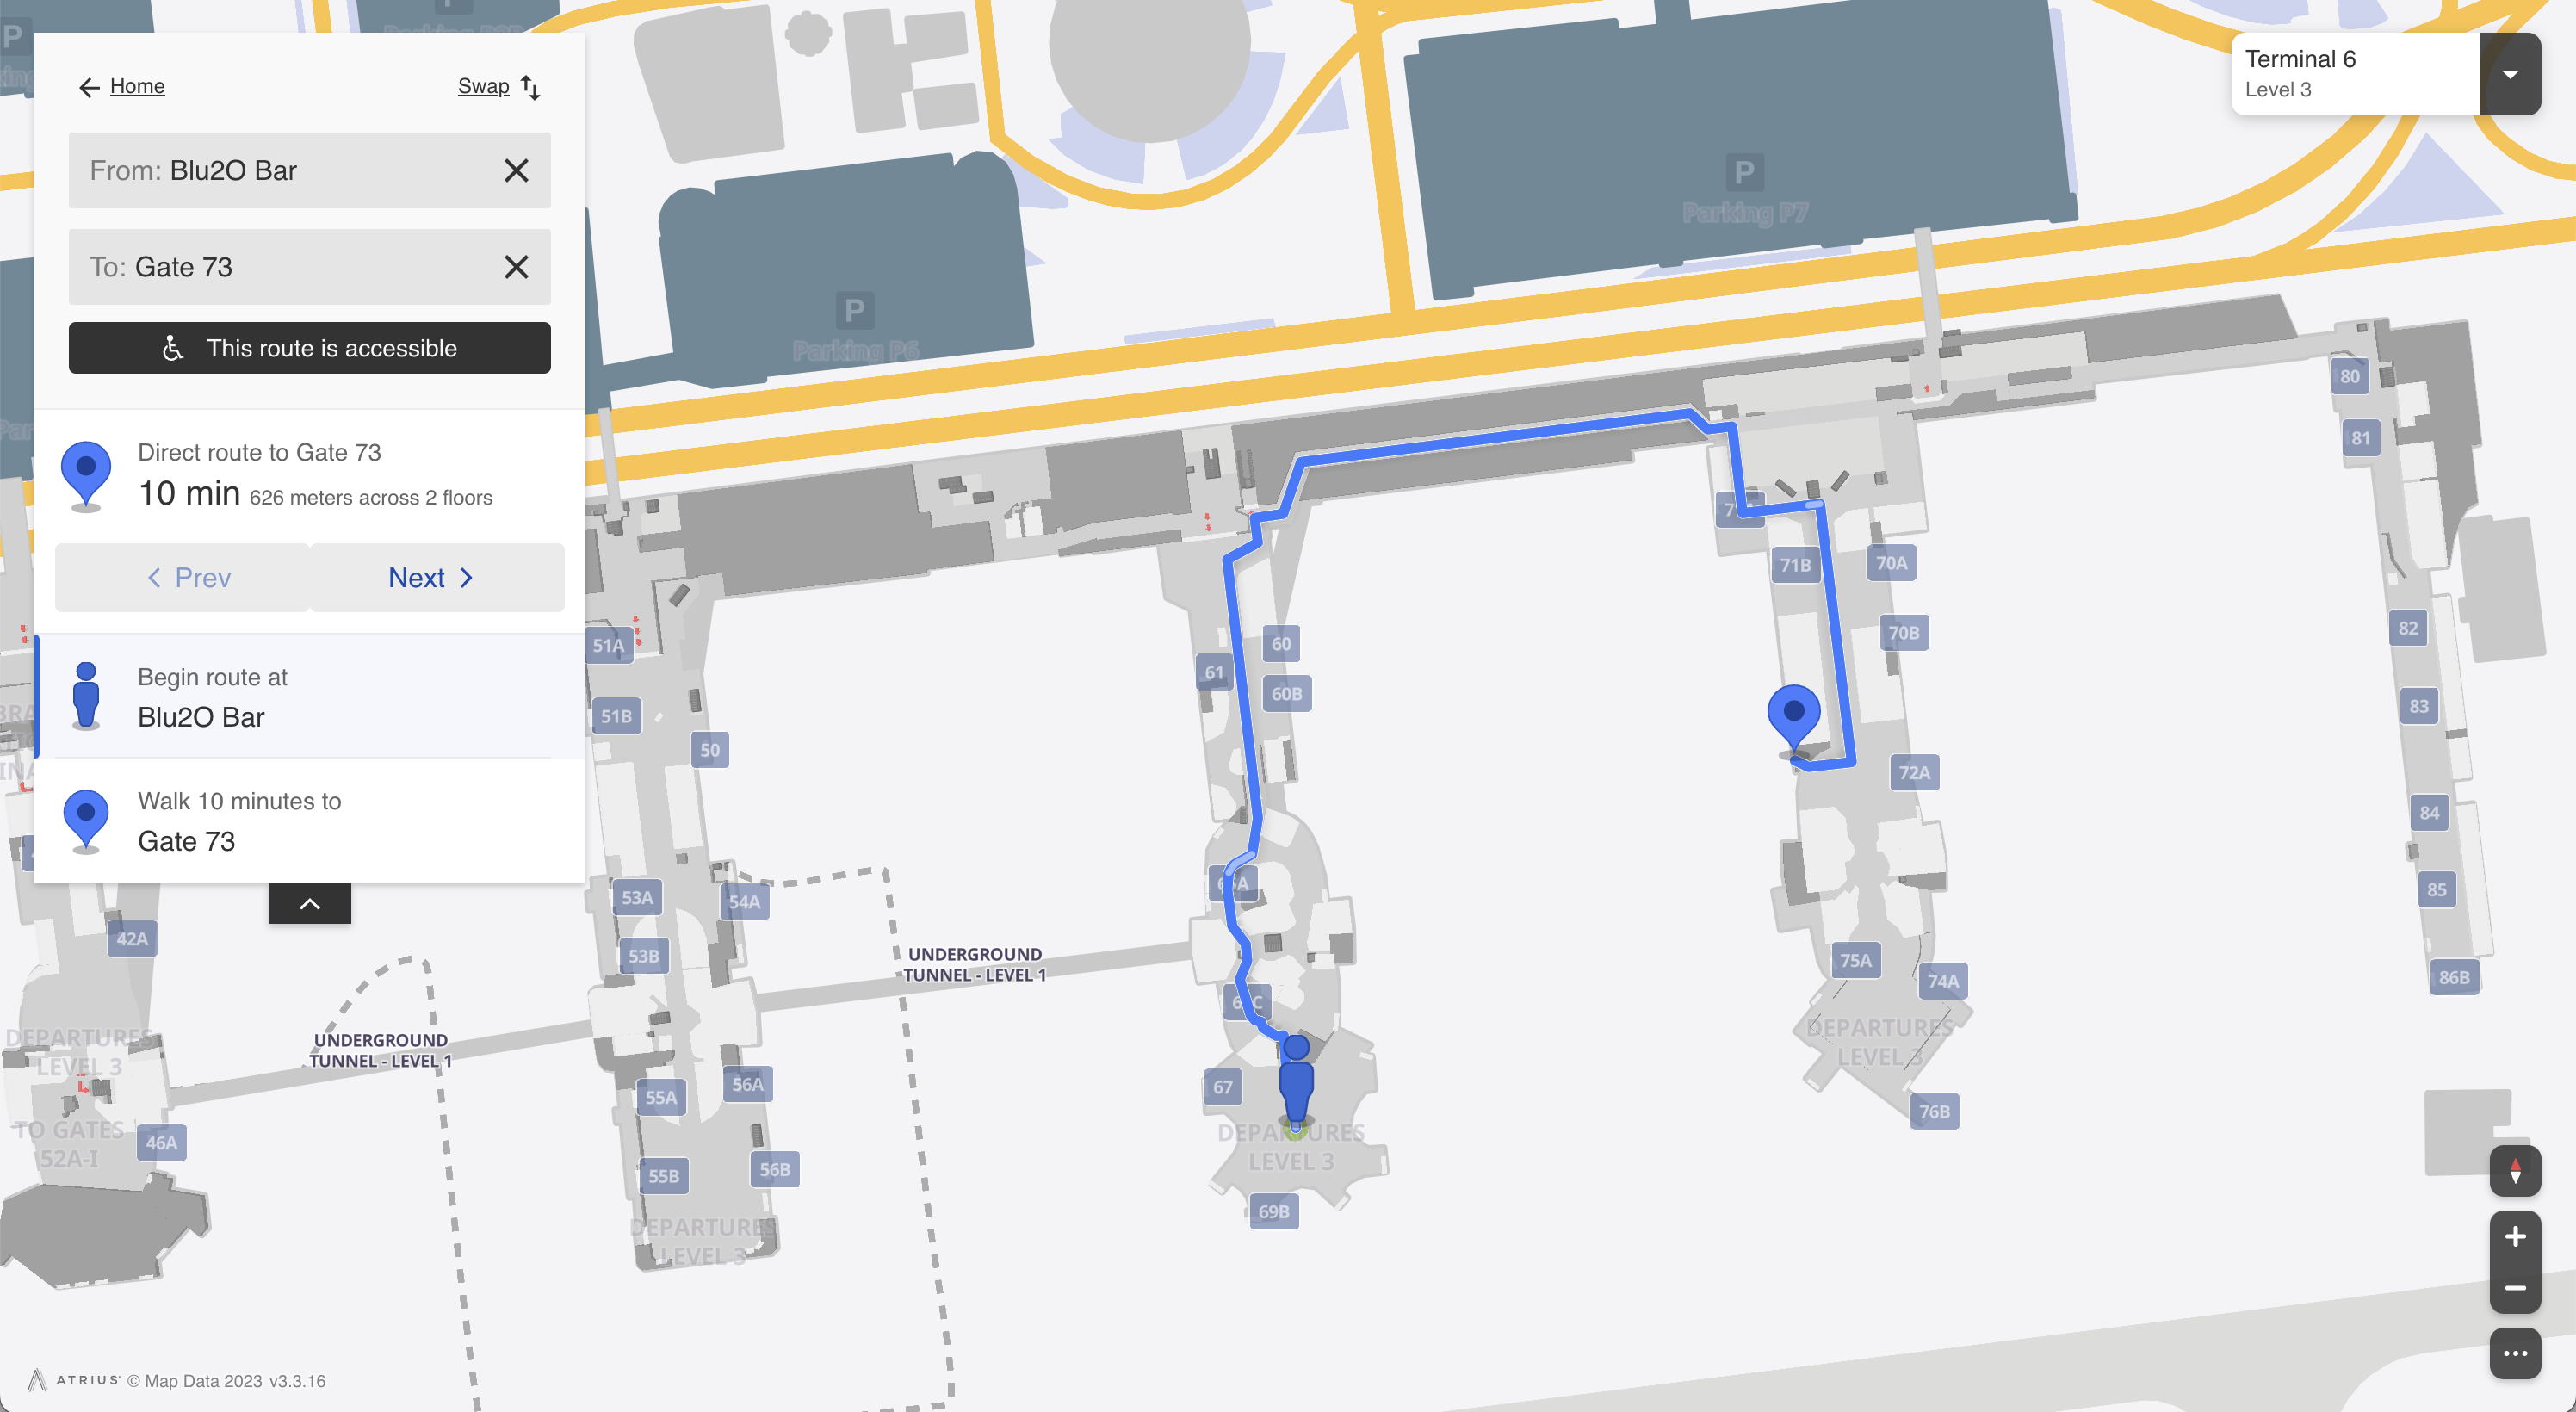
After loading, the map will show the requested directions and appear similar to the image below:
Specify the directions required in the URL
You can also show the directions at launch simply by adding the necessary params to the map URL in either of the following formats:
Simple Directions: <your_map_url>?navFrom=<poi_id>&navTo=<poi_id>&accessible=false
Multiple Destinations: <your_map_url>?multipointRouting=true&waypoints=[<poi_id>,<poi_id>,<poi_id>]&accessible=false
For the above to work, you need to specify in your launch config that url deep links are accepted by adding the "supportURLDeepLinks" key as shown below:
<html lang="en">
<head>
<script type="module">
import LMInit from 'https://maps.locuslabs.com/sdk/LocusMapsSDK.js'
const config = {
venueId: 'lax',
accountId: 'A11F4Y6SZRXH4X',
headless: false,
supportURLDeepLinks: true
}
window.LMInit = LMInit
LMInit.setLogging(true)
LMInit.newMap('.mymap', config, "https://maps.locuslabs.com/sdk/")
.then(m => { window.map = m })
.catch(e => console.error('Error initializing map: ', e))
</script>
<style>
html, body, .mymap {
height: 100%; margin: 0; padding: 0;
}
</style>
</head>
<body>
<div class="mymap" style="height: 100%;"></div>
</body>
</html>Try it out
See the map open showing the directions using only the URL params with the following URLs:
Simple Directions: ?navFrom=1025&navTo=551&accessible=false
Multiple Destinations: ?multipointRouting=true&waypoints=[1025,870,551]&accessible=false
Updated 2 months ago